|
Over the course of this first trimester, I have learned a lot about digital photography. When I walked in on the first day, I knew how to press the button to take a picture, and that was just about it. Now, I know all of the basics and can go on to become more creative with my photographs. One specific thing I learned to do this fall is how to use photoshop. I'd always seen it as something complicated that only professionals use. However, I now know what makes it work, and I can successfully create works of art through it. At the beginning of the year, my photoshop work looked like this: 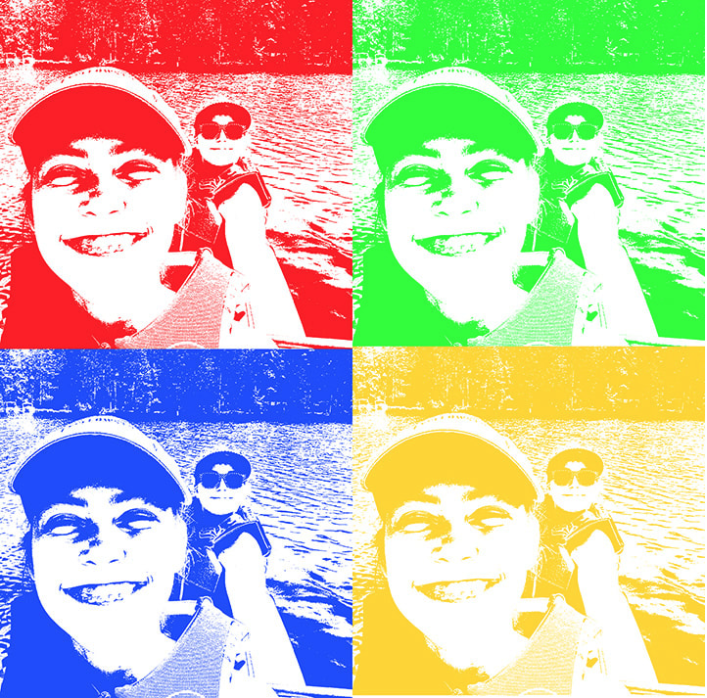 This pop art piece is decent, but it only used the most basic of photoshop tools: Hue and saturation, levels, and layer composition. Through this assignment and more that followed it, I learned more and more about photoshop until I had the tools to create more intricate and creative pieces. Here is one of my final photoshop assignments: 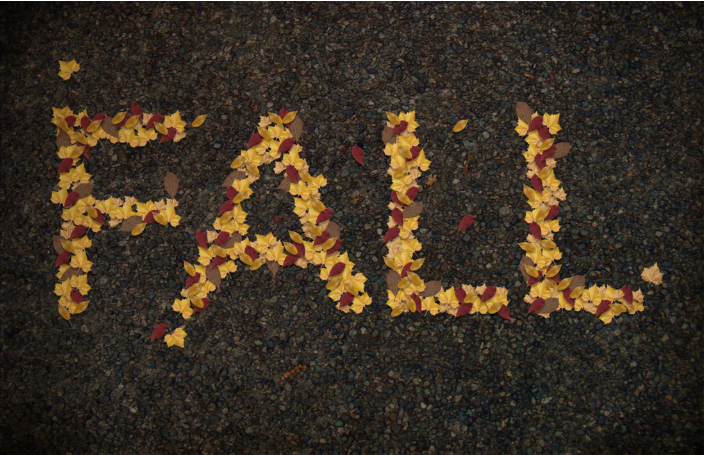 This project required the ability to use layers, adjust the "look" of the layers, and use shortcuts to move the multiple aspects of the image, as well as many more tools. I learned a lot through these photoshop tutorials, and I am excited to use the things I've learned in future classes, or for fun. Another thing that I learned this trimester is how to take photographs that are pleasing to the eye and have multiple composition aspects to make them more interesting. At the beginning of this trimester, my pictures were two-dimensional and boring. Also, I was using photoshop incorrectly in an attempt to make my pictures look "better". Here is an example: 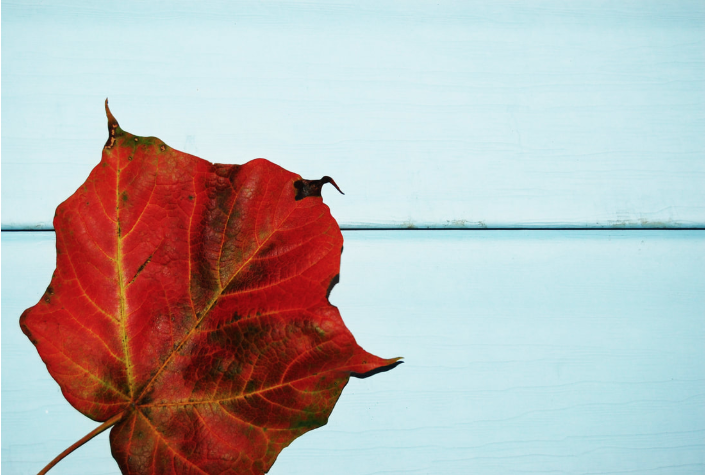 In this picture, the colors are too vivid, and the colors themselves do not go well together. Also, the artificial light from the flash of the camera makes it look stark and ugly. Here are a few photos I took later in the trimester: As I said earlier, I learned to take photographs with more visual interest and learned to use photoshop to compliment the already well composed photographs instead of trying to make the photograph interesting through photoshop.
I gained a lot of knowledge through digital photo 1 that will help me in later photography classes, and help me if I decide to pursue photography as a hobby.
0 Comments
For my final photo shoot assignment, I wanted to revisit one of my favorite things we did in this class: Multiple me photoshop compositions. I had a lot of fun doing this the first time, so I wanted to do it again for my open choice photo shoot assignment. This time, I experimented with having my subjects overlap one another and how to edit those pictures in photoshop. I also used objects instead of just people as my subjects. Here is my best photo: 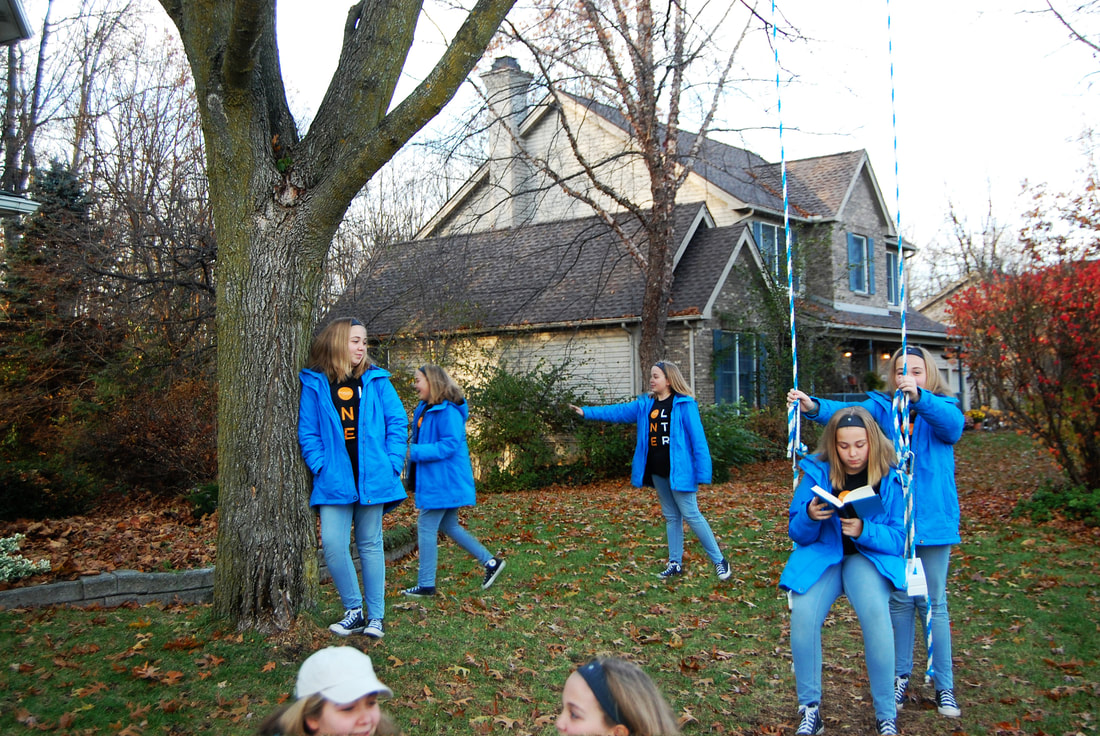 Other than the photoshop work done to connect all of these pictures, there was no other editing done. Here are my next best multiple me photoshop projects: In this assignment, we were supposed to take a portrait of a subject in a studio and outside the studio using the correct aperture and shutter speed settings, with our camera in vertical portrait mode. Then, we used the tools that we have learned how to use to create frames around the pictures in photoshop. Here are my two photos I took:   Here is the final product, after I edited the exposure of the images a little and framed them on a canvas:  Through this project, I learned how to take good portraits without fancy lighting using a simple white board, and the basic criteria for taking a portrait photo. I also learned how to create frames around pictures in photoshop.
In this assignment, we were supposed to follow photoshop tutorials that were either given to us or that we found at follow through with them to the best of our ability. I completed six photoshop tutorials, including the two we had to do. For four of them, I used tutorials that were provided for me. For the other two, I found tutorials to do. Here is the first photoshop project I completed, dash of color:  Here is the original photo:  I used http://www.digital-photography-school.com/mono-with-a-dash-of-colour-photoshop-cs2-tutorial to complete this project. In this tutorial, we turned the entire photo black and white and then colorized a certain part of the photograph. I used hue and saturation and the history brush tool mainly in this project. I found this tutorial quite easy because I'd used all of the tools needed before. The next photoshop project I completed made my picture look like a stack of polaroid pictures: 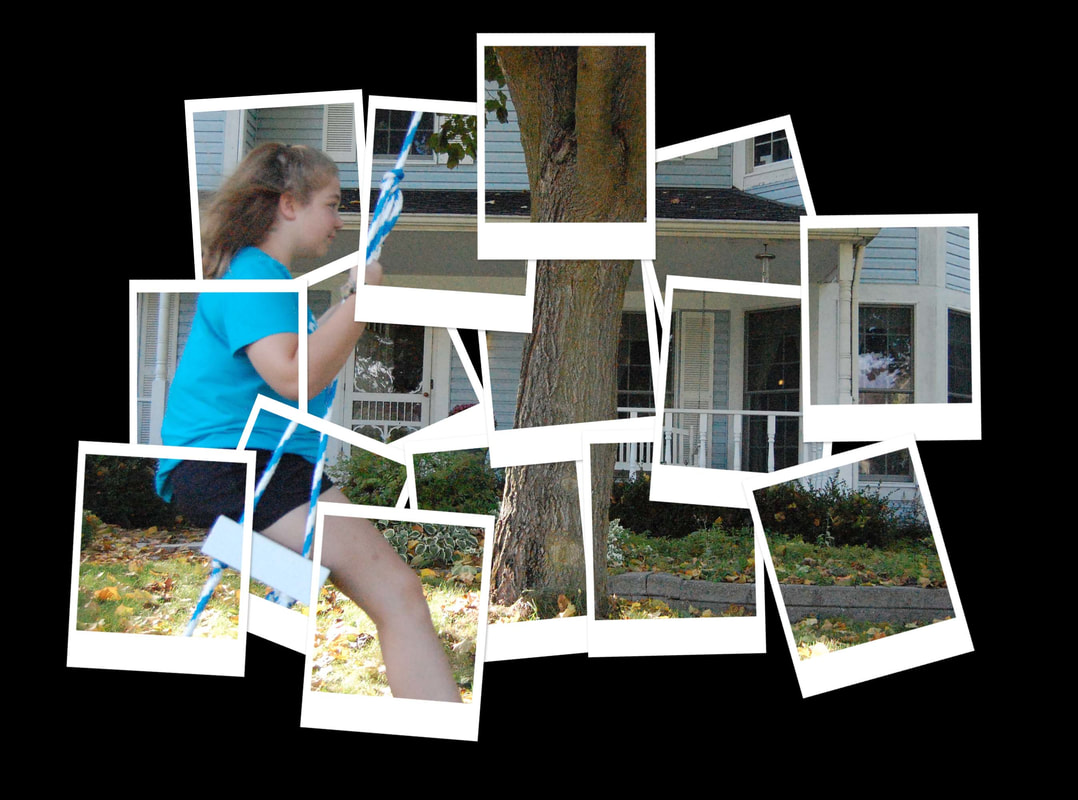 Here is the original picture: 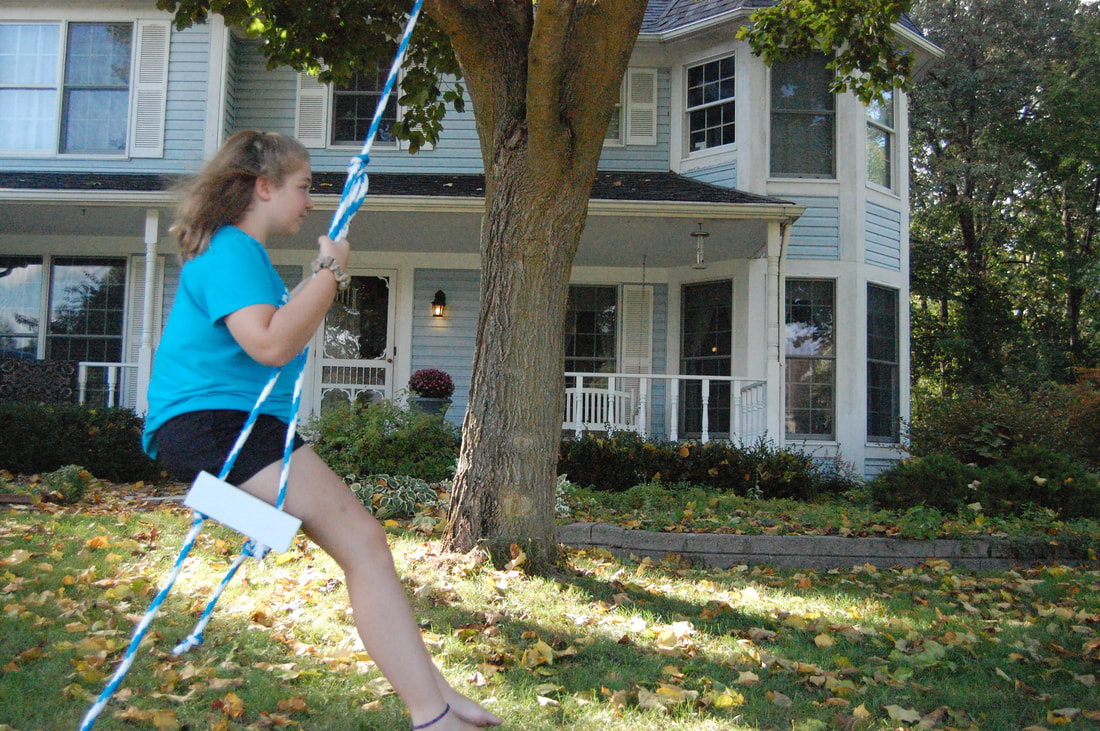 I used https://www.photoshopessentials.com/photo-effects/polaroids/ to complete this project. In this tutorial, we used clipping masks and fill colors to cover certain parts of the image and reveal other parts. This tutorial was a little confusing at first, but once I understood how to use the tools, it became much easier. The third photoshop tutorial I did I found on my own. Here is the link:https://www.picturecorrect.com/tips/how-to-edit-eyes-in-photoshop/ 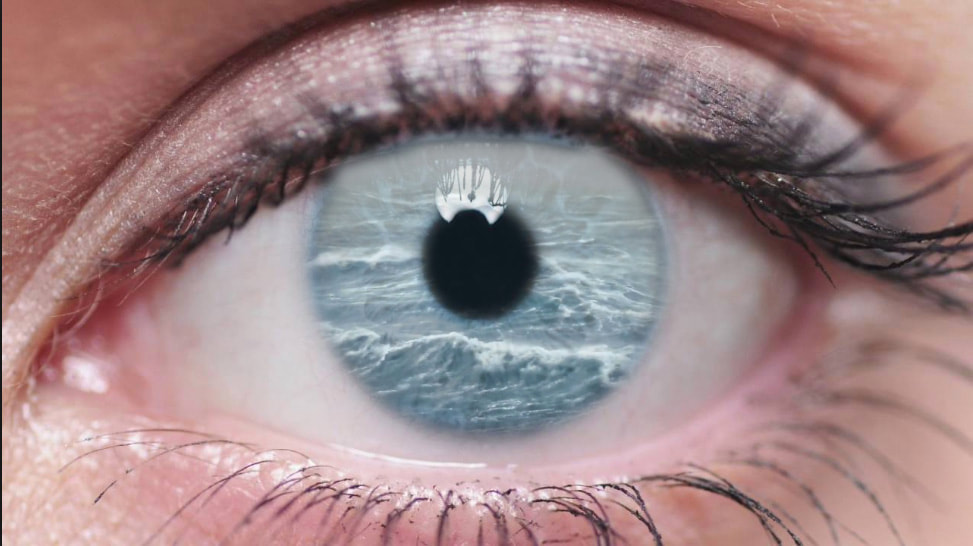 Here is the original photo: 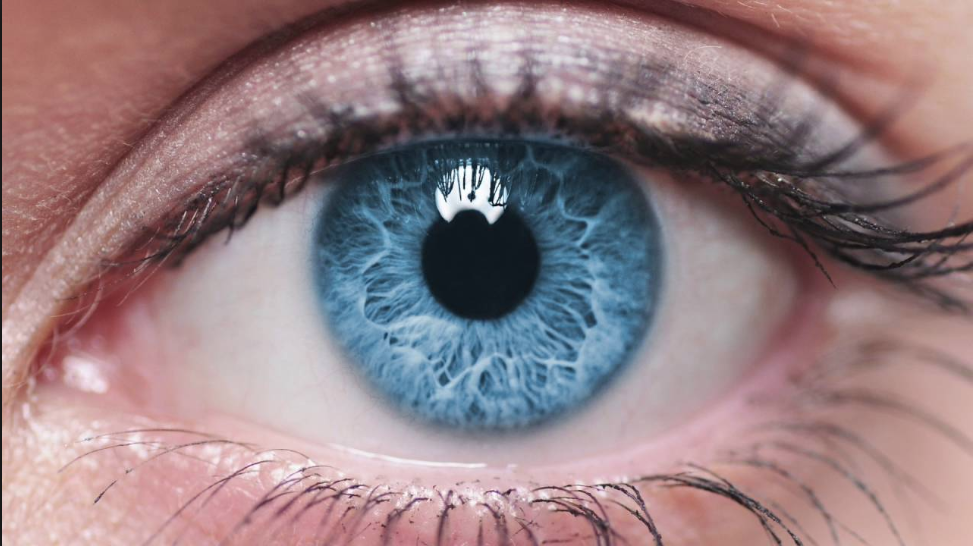 This tutorial was very easy because I'd used all the tools before. I used the select tool, special paste, and other specific photo adjustments to finish this project. I found it fun to replace every day things with unique textures. The next photoshop tutorial I did replaced the TV screen of an image with an athlete popping out of the screen. I found this tutorial on the list given to us. 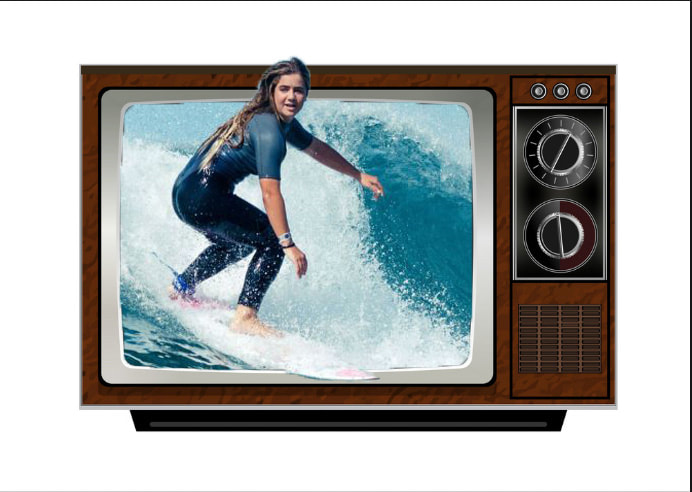 Here is the original photo that I added the layers on to:  This tutorial was mostly simple, with a few bumps along the way. I used special paste and the select tool, as well as clipping masks to complete this photoshop project. I enjoyed this tutorial as well because it felt more professional than the other tutorials did, as if you could use it in a travel brochure or something of the type. The next tutorial I completed was tuning an image so it looked like it was being reflected onto a body of water. I found this tutorial on the list given to us. 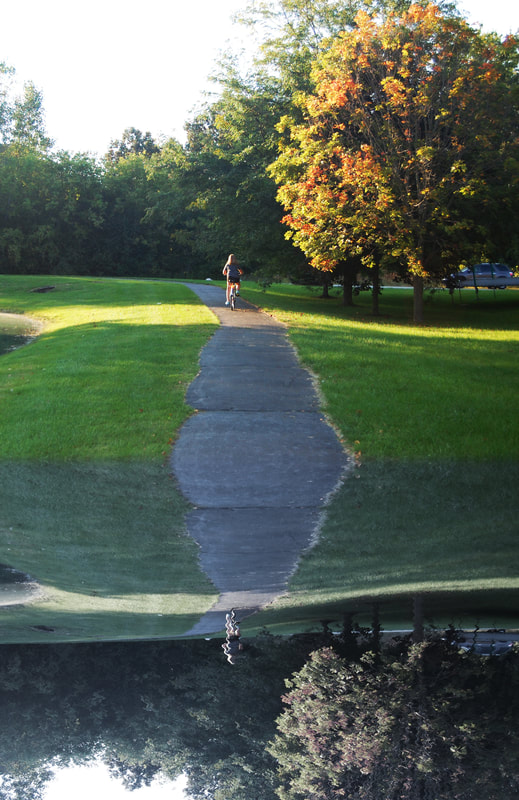 Here is the original photograph: 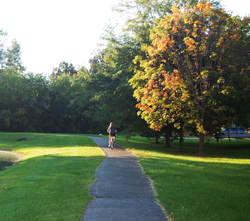 I had some difficulties with this tutorial's complicated layers at first, but they worked themselves out eventually. I used all of the tools that I'd learned how to use so far, like hue and saturation, crop, and fill colors, including some new ones. I enjoyed this tutorial as well, even though it was frustrating at the beginning. The final photoshop tutorial I completed was found at https://design.tutsplus.com/tutorials/how-to-create-a-realistic-autumn-leaves-text-effect-in-adobe-photoshop--cms-25158 . In this tutorial, I was given an image of asphalt, and told to lay leaves out in the shape of the word "fall". Here is the completed project: 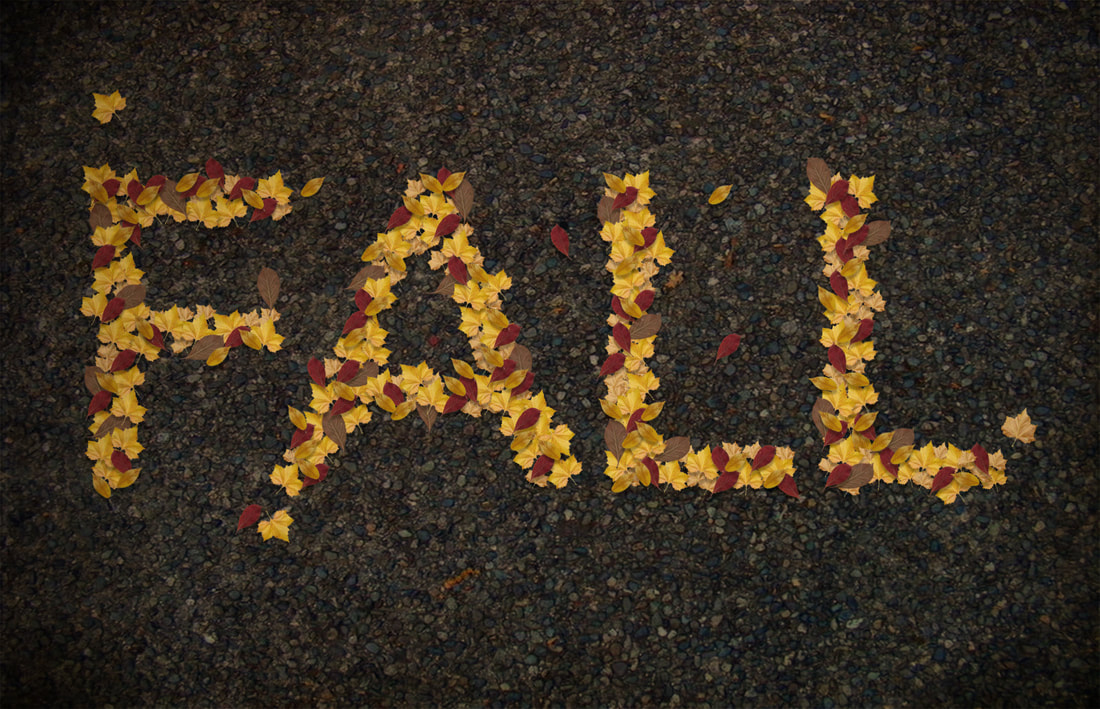 Here is the picture I began with: 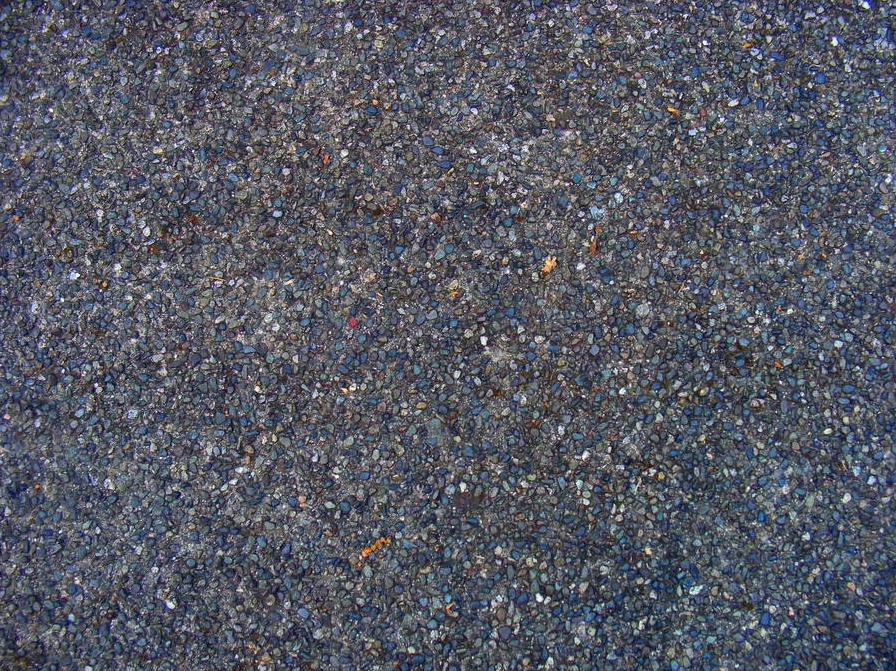 In this tutorial, I used crop, command T for sizing, duplicating shortcuts, the insert text tool, and many other new tools to complete my project. It was very time consuming, because I had to lay out individual leaves to form the letters. It was a fun project, though, and it taught me useful skills that I will be able to use in future photoshop compositions.
Overall, I enjoyed finding photoshop tutorials and creating new images based on the instructions. I learned about many tricks and shortcuts that will help me in the future when I am using photoshop. For my sixth photoshoot assignment, I wanted to capture the fall colors in my backyard. At first, I was taking pictures of the foliage directly. However, the colors seemed to overpower the image, so I decided to put a different subject in the foreground and blur the colorful background, giving the photo a warm, autumn look. Through this photoshoot, I learned that if your pictures don't work out at first, try them at different angles, because you may get a better result. Here is my best photograph, unedited: 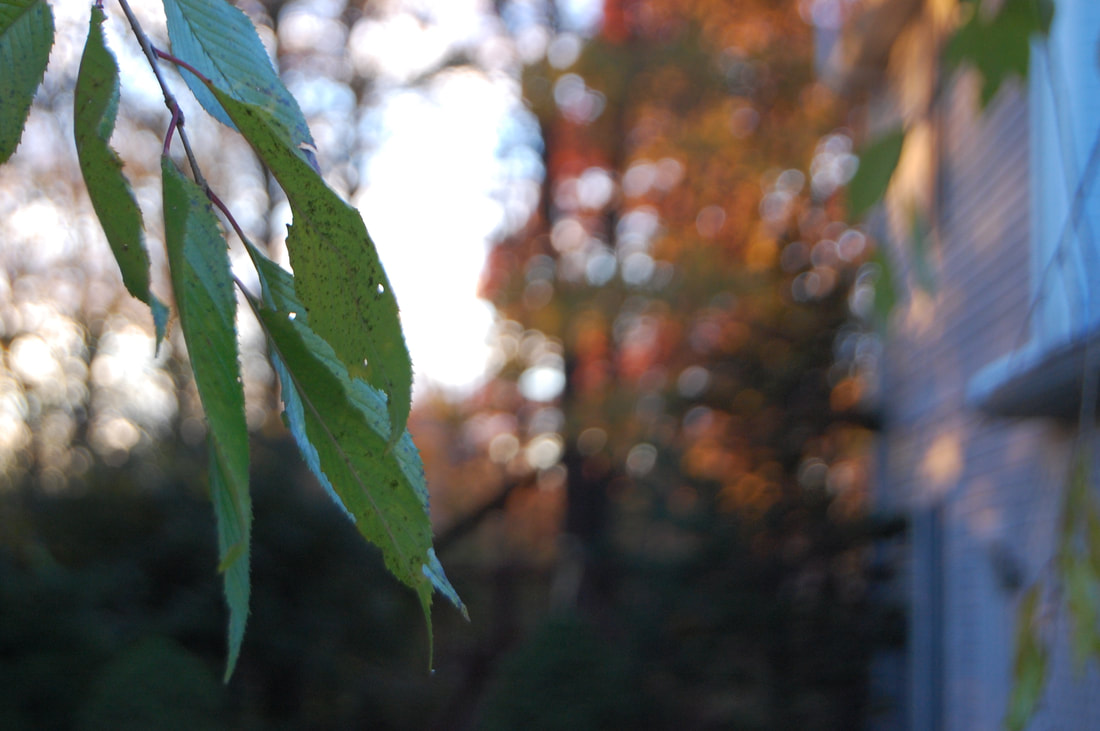 It was shot with a shutter speed of 1/60 of a second, an ISO of 800, and an aperture of f/6.3. Here is my edited picture: 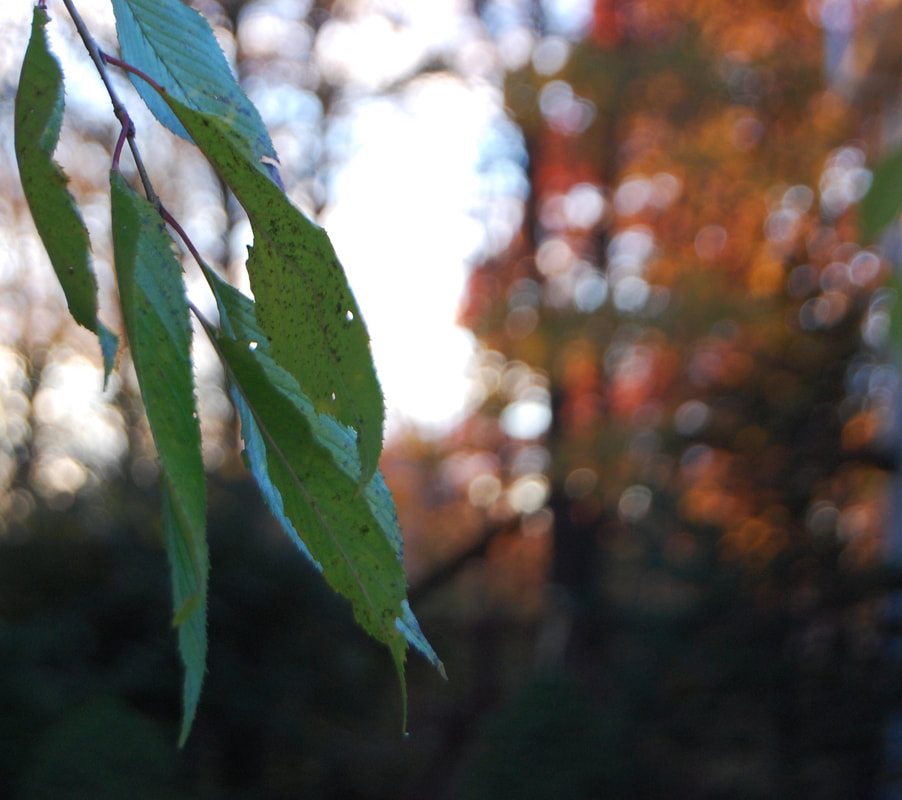 To make the image more appealing to the eye, I cropped my house out of the photo, increased the contrast, and increased the brightness. Here are my next five best photos: For my fifth shooting assignment, I was going to take pictures of nature because I was planning to go hiking over the weekend. However, the weather did not cooperate, and it was mostly rainy and dreary. I decided to try to make the best of my situation and take pictures of my sister, my star model, jumping in puddles. I learned more about adjusting shutter speed and aperture to keep a good exposure because I had to shoot the picture with a high shutter speed to capture the motion. Here is my best photo, without editing: 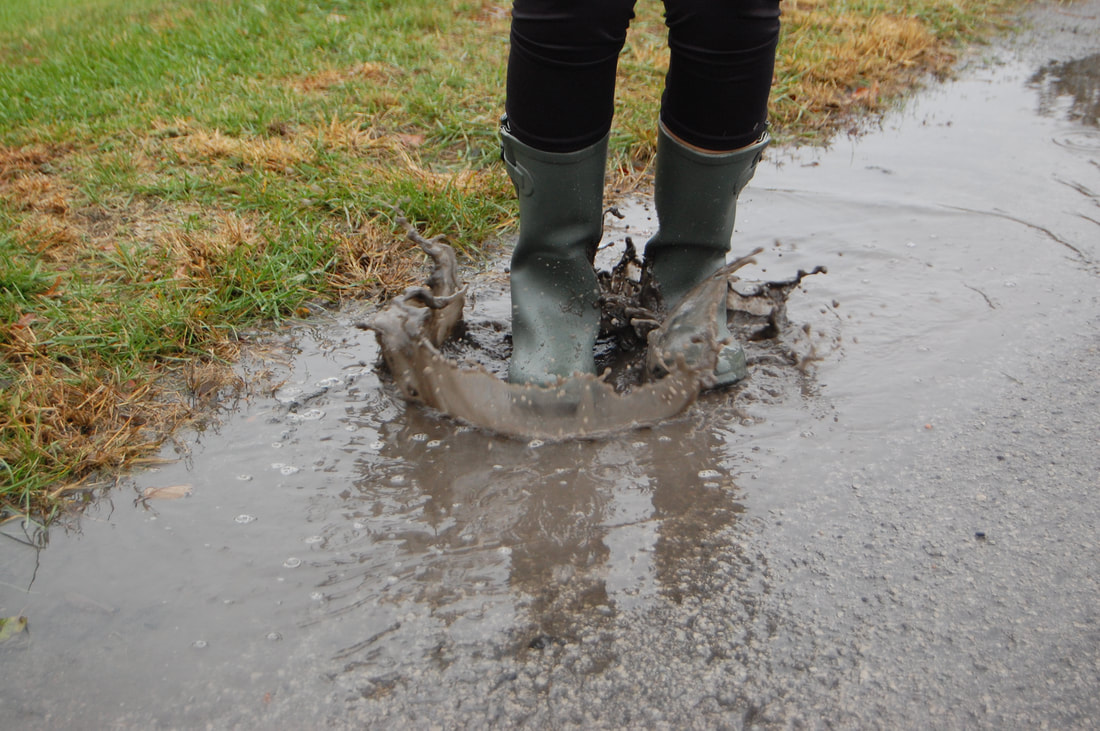 It was shot with an ISO of 800, an aperture of f/5.6, and a shutter speed of 1/200 of a second. When I edited my photo, I darkened the image and cropped it to satisfy the rule of thirds and give it a better general look. Here is the edited version: 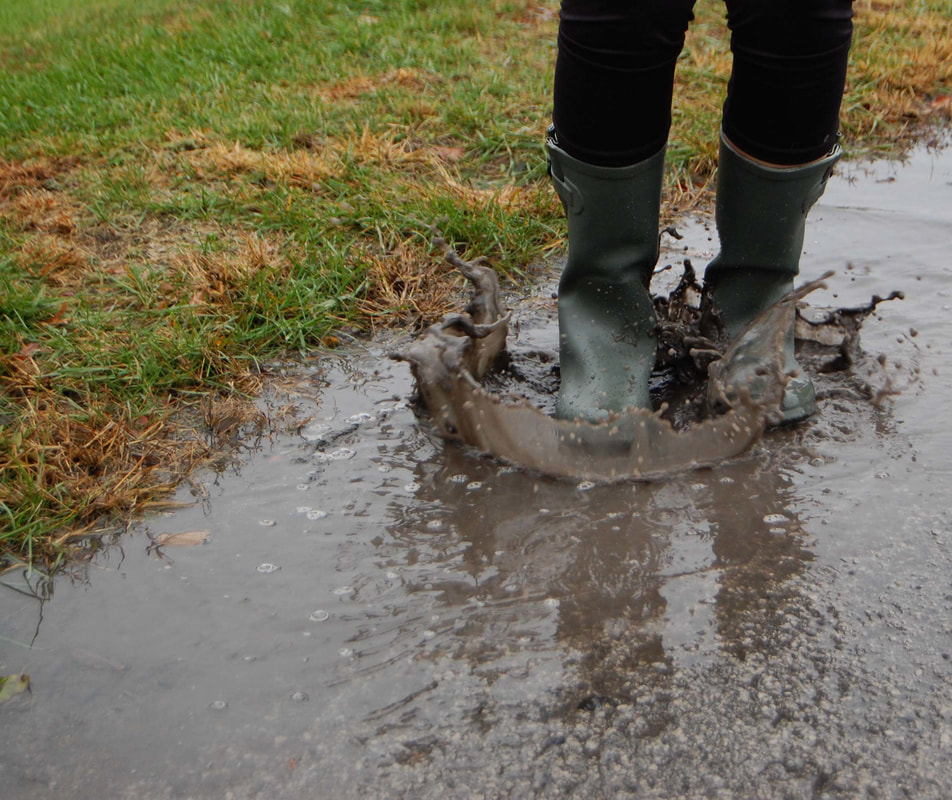 Here are my next 5 best photos: In this photoshop assignment, we took pictures of the same scene multiple times with the same person in different positions. I set my camera up on a tripod and either set a timer or took a picture myself. I had a lot of fun doing this assignment. Through this assignment, I learned how to use layer masks to create multiples of something in the same frame. Here is the picture I took at school: 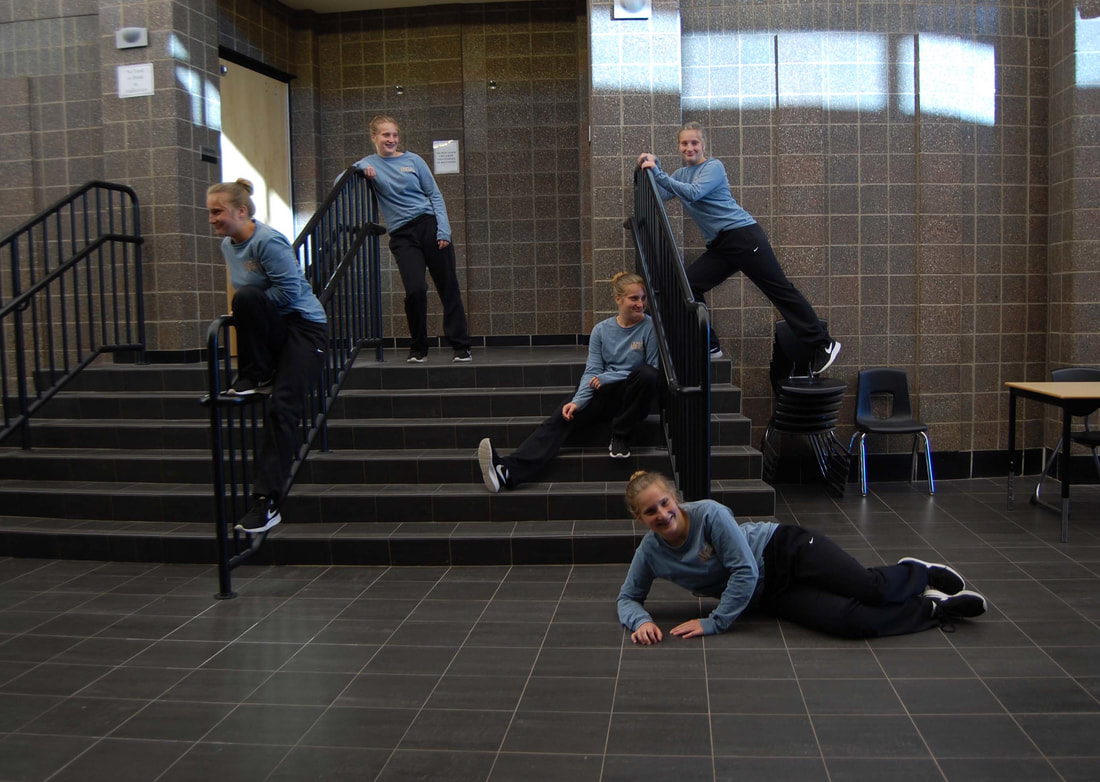 Here's the picture I took at home with a timer: 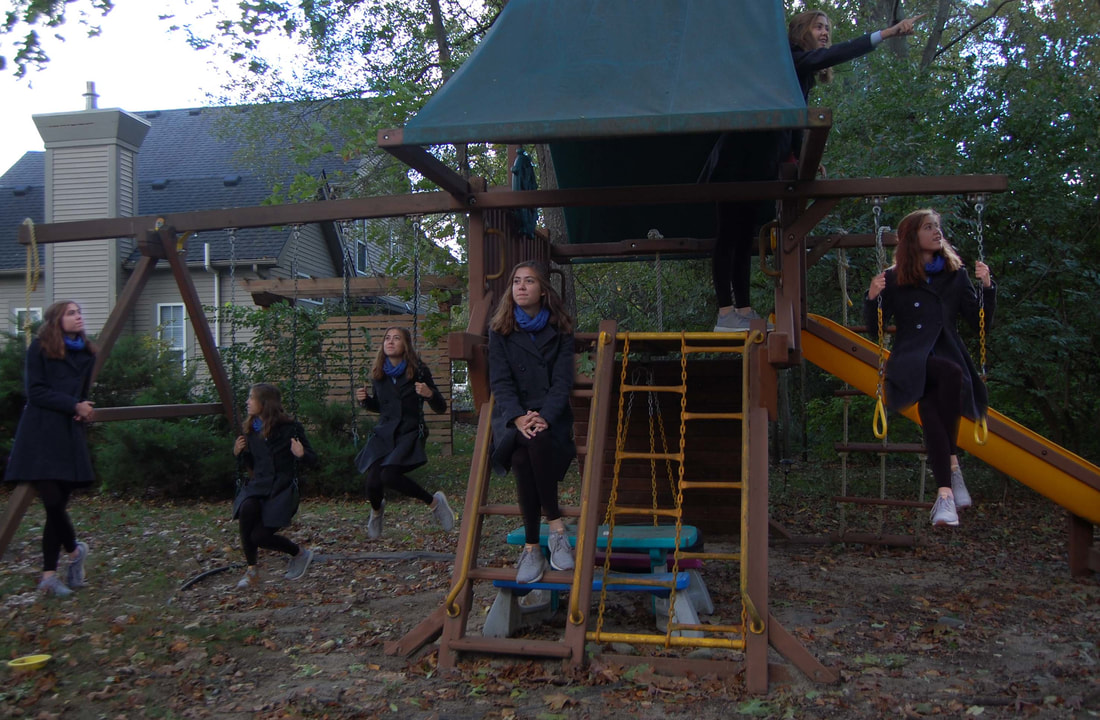 In my fourth shooting assignment, I captured shadows and light in the autumn sunlight. I had quite a difficult time completing this assignment because my camera broke while I was doing it. However, we were able to fix it. I wanted to use the setting sunlight in my photos, so I put a material between the subject and the sun to create cool shadows. During this photo shoot, I learned that texture adds a lot of interest to a photo. Here is my best photo without editing:  This photo was taken with a shutter speed of 1/125 of a second, an aperture of f/5.6, and an ISO of 320. Here is my edited photo:  In photoshop, I made the image brighter and added more contrast. Here are my next 5 best photos: In our fourth photoshop assignment, we were to take a picture of somewhere around the school and use photoshop to add a theme to the scene, such as "under the sea" or "in the jungle". The theme I chose to portray was outer space. I had a lot of fun doing this project, despite some minor complications with layering. Here is my original photo I took of the school: 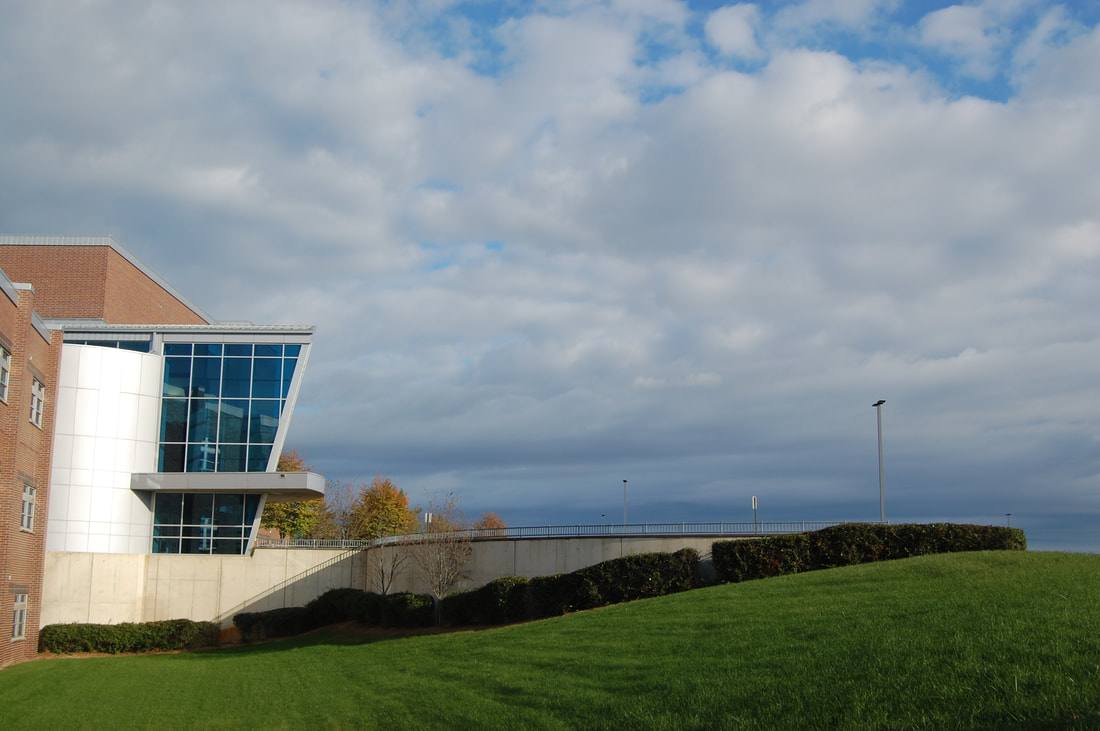 And here is my edited version: 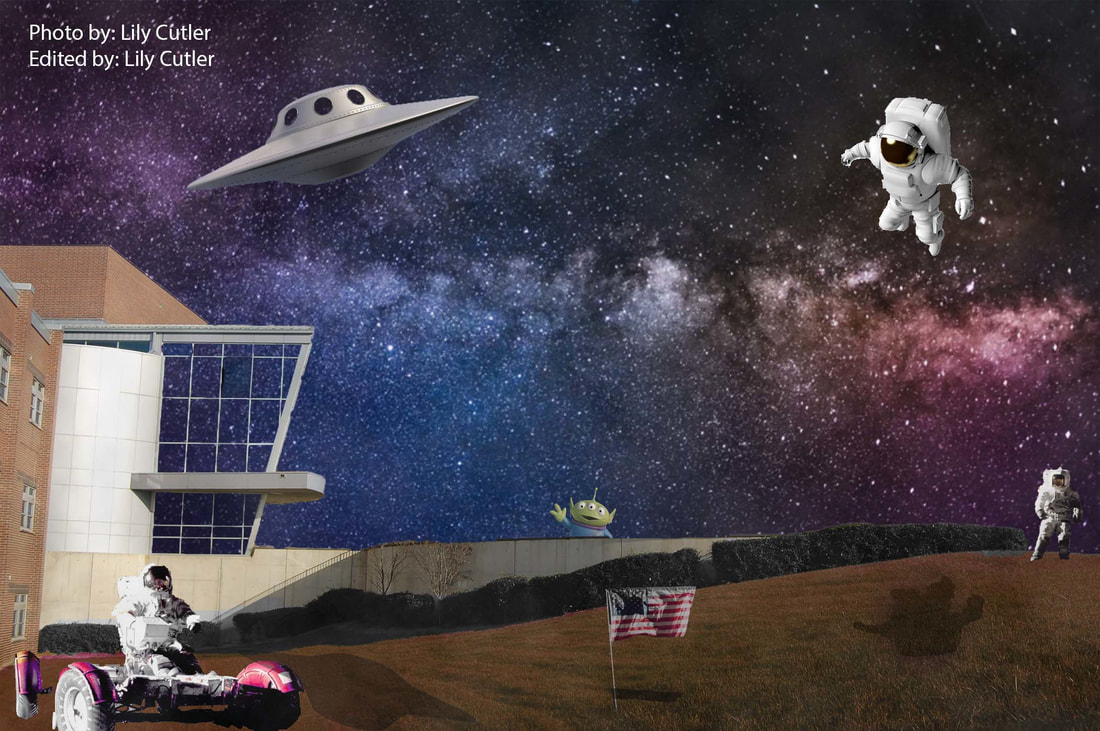 For my third photo shoot assignment, I took pictures around my neighborhood that I thought would look good in black and white. It was difficult when I tried to take pictures at noon, but when I waited until about five p.m. the lighting was much better for capturing texture that could be converted into black and white. Through this shoot, I learned that when taking black and white pictures, lighting is a very important factor. Here is my best photo:  This photo was shot with a shutter speed of 1/500th of a second, an aperture of f/4.2, and an ISO of 800. Here are my next 5 best photos: |
AuthorHi! My name is Lily Cutler, and I'm a freshman at Saline High School. Archives
November 2018
Categories |
 RSS Feed
